Top Tips On Making A Really Useful Route Card
/WRITTEN by CHRIS & ANNE ENSOLL
As part of the Mountain Leader training and assessment courses we cover remote supervision and route planning, and look at lots of different ways that this can be done. I ask the candidates to consider this: what is the point of doing a route card? I think there are two crucial points when considering how to draw up a route card: it must be useful as a risk assessment document, and it has to make sense to the person who will be using it. The traditional route card with rows and columns doesn’t make sense to everyone, particularly to anyone who struggles with numbers. So what should you include on a route card, and how should it be presented?

To be useful as a risk assessment document, a route card should include the following:
The planned route with alternative routes and possible escapes if Plan A cannot or should not go ahead, for example when reaching a river crossing, on an exposed part of the route, or in adverse weather.
Planned start and finish times.
The names of key locations.
Grid references of key locations, or the key locations marked on an OS map
The distance and approximate time from each key location to the next.
The bearing from each key location to the next.
Height gain or loss of each leg.
Catching features of each leg.
Potential hazards e.g. escarpment should be on right hand side
In addition, other information can be left with a responsible person, but it doesn’t necessarily have to be on the route card:
Details of who's in the group, any medical information, and their emergency points of contact.
A record of equipment carried by the group, including maps.
What to do if the group fails to return on time.

All the following examples, with the exception of option two, would be used with a map. Options three, four and five are my preferred ways of getting people to present the information. You can use mapping software to work out all the numbers (we use Memory Map but there are other good options), and then you can give these to the group. All of the examples are missing some of the info listed above, but they give a good idea of ways to present the information.
Option one
If you have had anything to do with the Duke of Edinburgh award scheme, you will have seen and perhaps used a route card like this. If you are scientifically or mathematically minded and like tables of numbers, then you will find this useful, but for some people it is just a load of numbers that they find hard to relate to what they are seeing around them. As someone with dyslexia, this is a nightmare for me.

Option two
Having a map marked with the route is an improvement on the table above, but to be useful it needs the route divided into legs with key locations and all the relevant details shown.
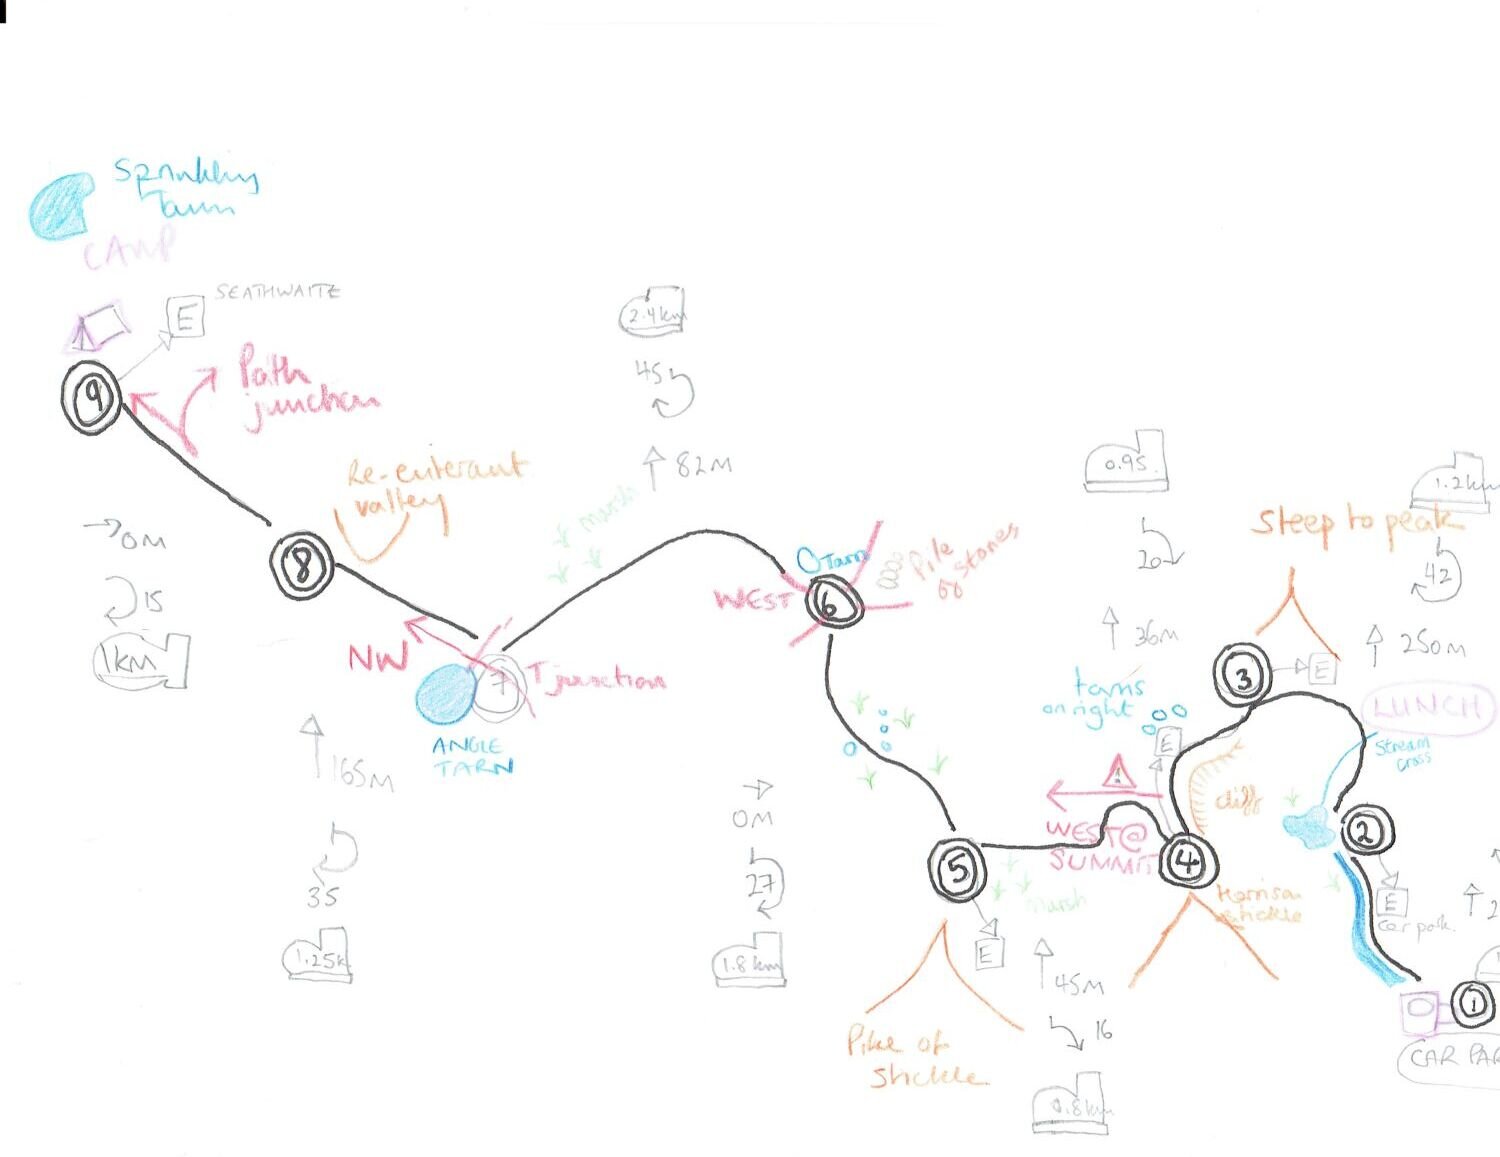
Option three
A cartoon-style diagram showing all the relevant information is easy to follow. This example doesn’t show escape routes, but they could easily be included.

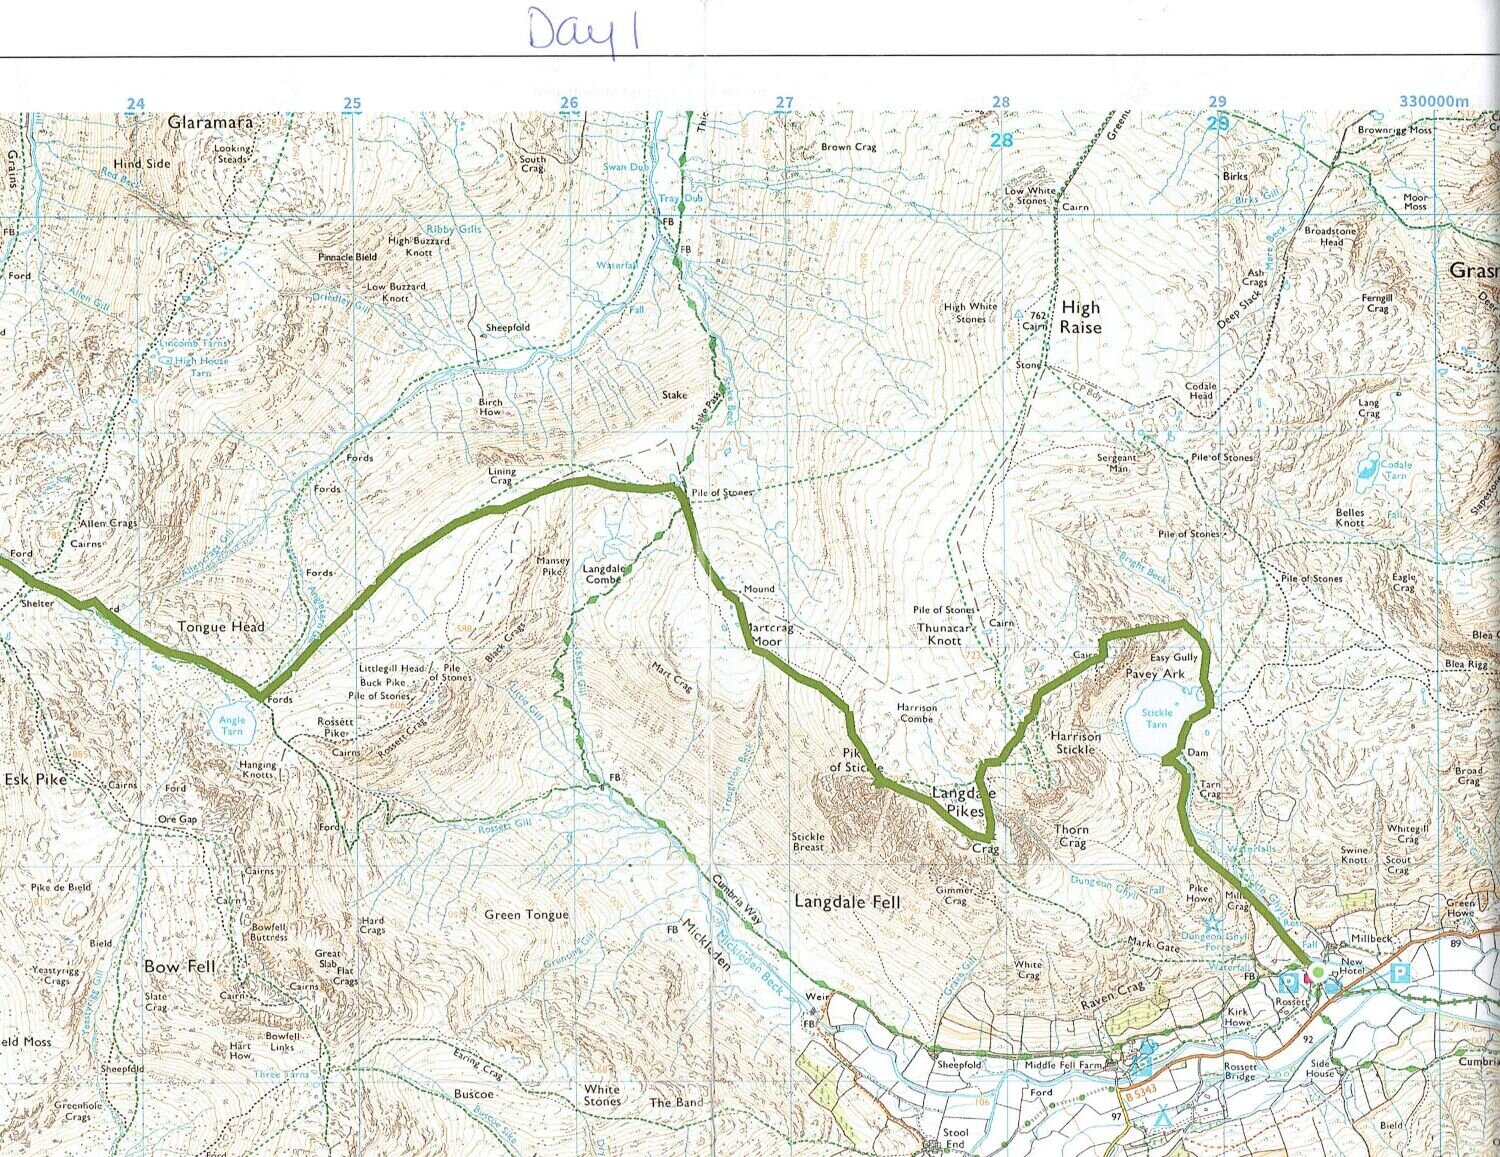
Option four
This is a ‘Lord of the Rings’ style of map. This would be really good together with option two if both maps had the same points marked.
Option five
This is a great example of how to show hazards on a sketch map.

What do you think?
What’s your favourite kind of route map, and why? Leave a comment below - we’re looking forward to hearing from you!