The ABC of Trad Climbing
/WRITTEN by CHRIS & ANNE ENSOLL
Until fairly recently, climbing was just called… climbing. With the rise of sport climbing, a new name was needed for what everyone had been doing previously, and so the name ‘traditional climbing’, or ‘trad climbing’, was born. In sport climbing, the routes have pre-placed bolts, allowing the lead climber to follow the route and quickly clip in to the bolts. In trad climbing, the lead climber carries, places and clips into protection (nuts, cams, etc) whilst finding the route, so as well as the physical challenge there is a significant mental challenge too. The basics of trad climbing can be summed up in three letters:
A = anchor
B = belay
C = climber

Trad climbing in the Lake District
A is for Anchor
When you get to the belay stance or the top of the route, face the rock and open your arms to about 60º (two-thirds of a right angle) - this is where you want to start looking for your anchors. How do you know if a piece of gear is going to be any good? There are three tests you should use:
1. the quality of the rock
What kind of rock is it? For example, granite is much stronger than sandstone.
Look: any cracks around the slab or block?
Touch: with one hand
Tap: with a hand or krab
Feel: does it move or vibrate?
Listen: does it sound hollow?
2. load transfer
You want to get the maximum possible load transfer area when placing a nut or a cam, ie the maximum amount of metal should be in contact with the rock. Always choose the biggest nut or cam that fits well into the crack.
3 direction of pull / load vector
Some gear is less directional, for example a thread or to some extent a well-placed cam. Others, for example wires or a sling over a block, can be very good in one vector and very poor in another, where they will lift out or off.
Here are some examples of poor and good anchors:

Poor load transfer in a nut

Good load transfer in a nut

Poor load transfer in a nut due to high point loading on underside

Good load transfer in a nut

Poor cam placement: working on two cams

Good cam placement: all four cams are fully engaged

Poor nut placement in a parallel crack, as it is likely to rip

Good load transfer with a nut in a narrowing crack
How do you know when the anchors are good enough?
Give a score out of 10, where 10 is a large block or a large tree. If you only have one anchor available, it must be a 10. If there are two 10s available, use them both, because two anchors are always better than one. With nuts, the size is a good guide to it’s score, for example a size 7 would get 6 or 7 points maximum. You will always need two nuts to get to a total score of 10 or more. With really small wires you might need 3 or even 4 to get up to 10 points.
B is for Belay
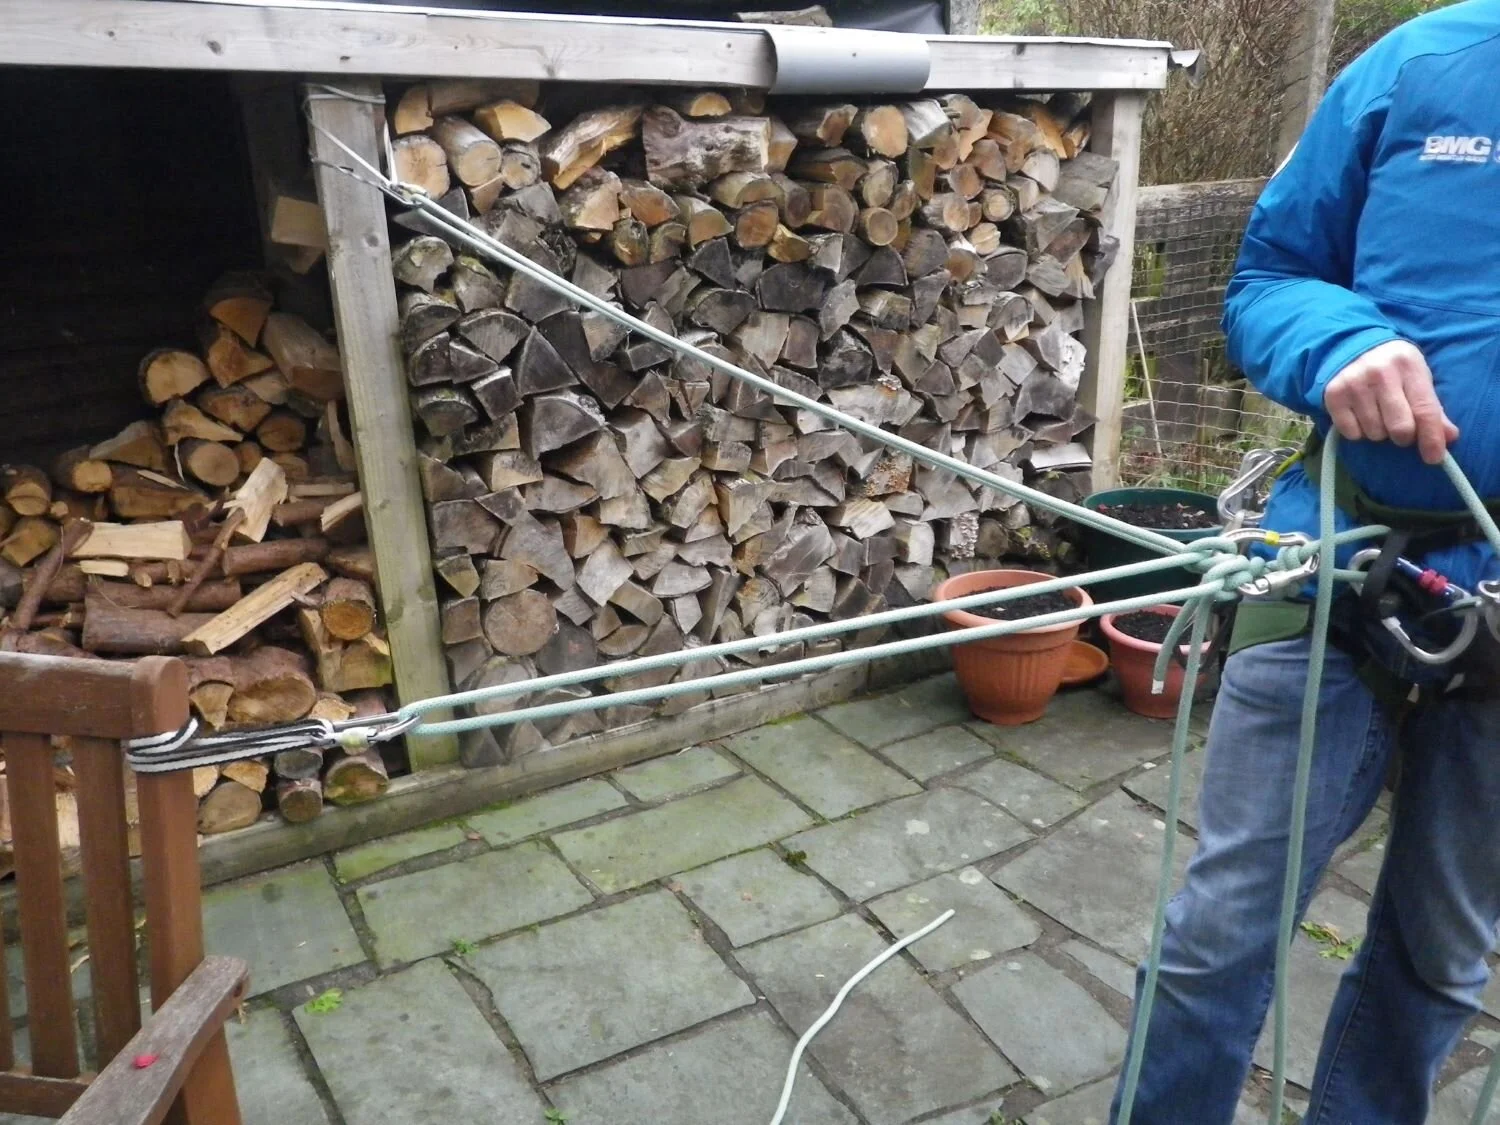
When you have selected your anchors you need to set up your belay quickly and efficiently. There are endless variations on how to do this, but we’re showing some of the simplest and quickest methods here. Lots of practice will make you slick and efficient, and you can do this anywhere – the photos were taken on our patio, and I used the wood store and the garden seat as my anchors.
Before you attach yourself to the anchors, you need to decide where to stand or sit in relation to them. Some things to consider:
Sit whenever possible – you will be more stable
If you are standing, you need to be balanced, stable and have high anchors
Sit/stand on a straight line from the anchors to the route – if you are off to one side and your second falls off, you will be pulled sideways
Aim for a view down the route so you can see and communicate with your second - this will often mean you have to sit/stand away from your anchors.
Aim for less than 90º in the angle where the ropes from the two anchors are attached to you
Whichever method you use, always adjust the ropes between you and the anchors so that there is as little slack as possible and you are sitting/standing with tight ropes – if you have slack in the system and your second falls off, you will be pulled forwards.
1. One anchor in-reach

One anchor in-reach
2. One anchor out-of-reach

One anchor out-of-reach
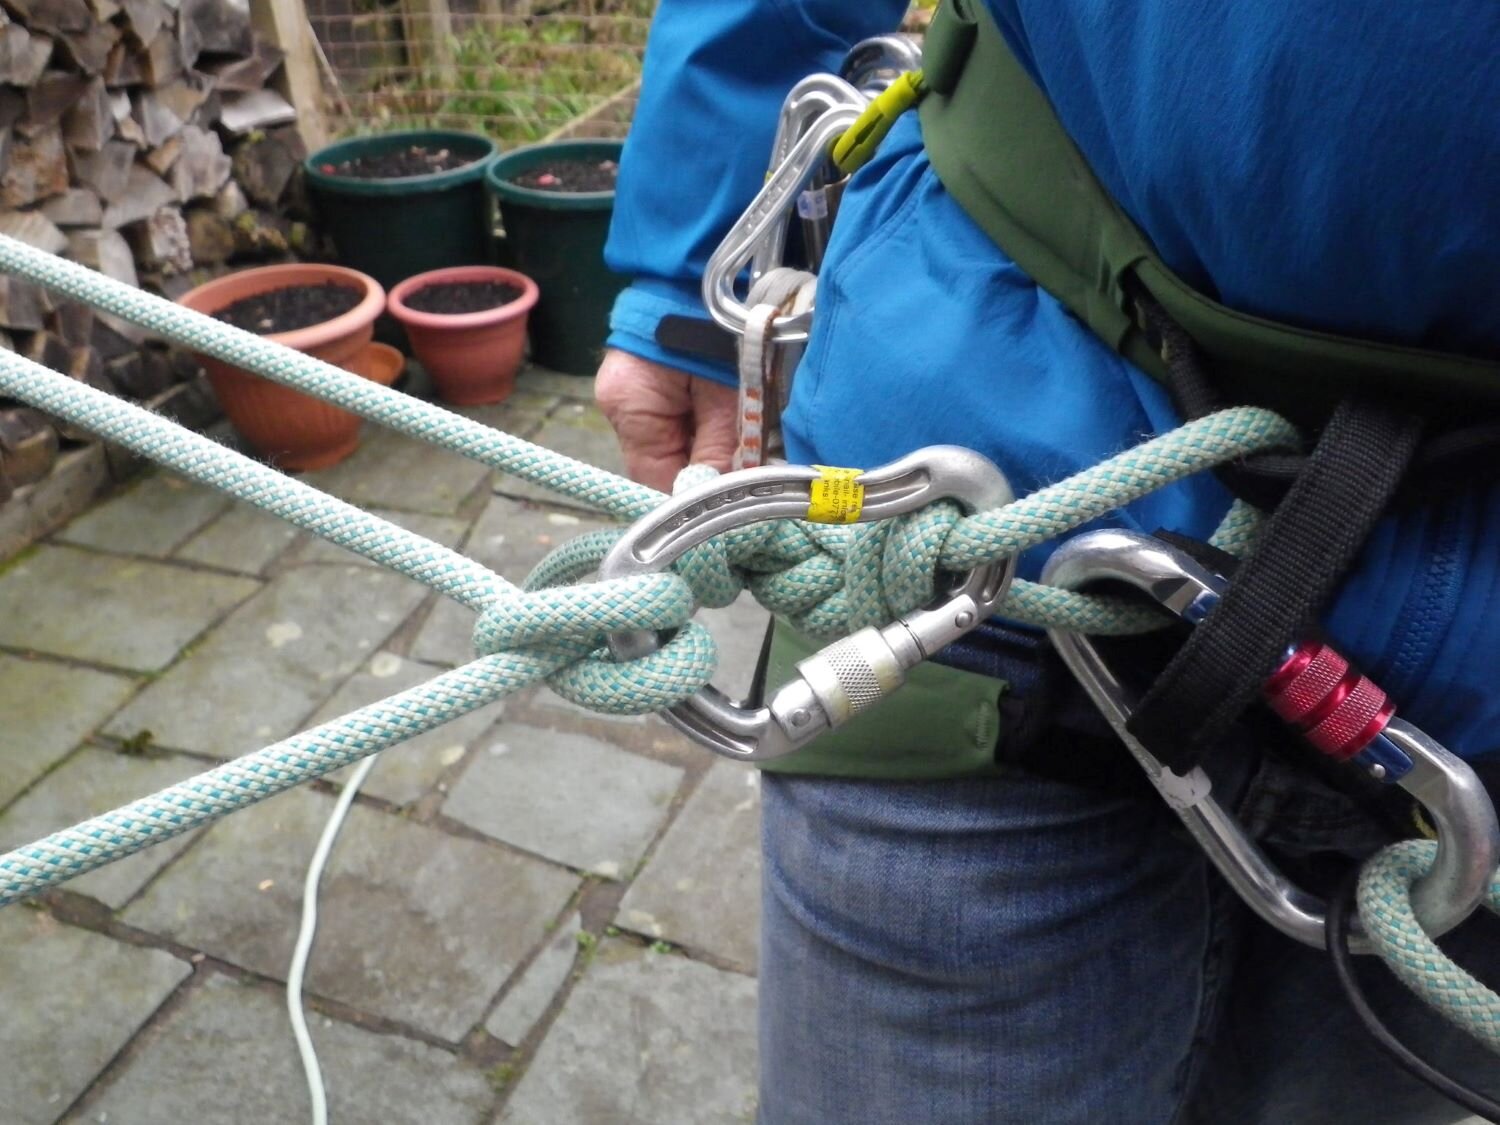
Clip the rope through the krab so that it is free-running. Go to your belay position and tie off the rope with a clove hitch in a krab attached to the loop where you are tied into the rope. Adjust the clove hitch so that you are tight on the rope.
3. One anchor in-reach, one anchor out-of-reach

One anchor in-reach, one anchor out-of-reach
Do exactly as described above for one anchor out-of-reach. Sitting/standing in your belay position, tie a second clove hitch on to the krab on the in-reach anchor. Adjust the second clove hitch.
One anchor in-reach, one anchor out-of-reach
4. Two out-of-reach anchors
Two out-of-reach anchors
Do exactly as described above for one anchor out-of-reach. Repeat with the second anchor. Use a large HMS krab on your rope loop so you have room for two clove hitches
5. Two in-reach anchors

Two in-reach anchors
Sitting/standing in your belay position, tie a clove hitch on to the krab on the first anchor. Leaving some slack rope between the two anchors, tie a second clove hitch on to the krab on the second anchor. Take the rope back to the krab on your rope loop and tie a third clove hitch. Adjust both the clove hitches on the krabs on the anchors.
You can watch how to practice all of these belays at home in videos on our Tutorials page.
C is for Climber
Trad climbing is all about the following:
1. Staying calm
When we become tense our breathing becomes shallow, fast and high up in the chest. We take in less oxygen than we need. When you get in a tense situation when climbing, try to breathe using your diaphraghm so that you’re filling your lungs (also known as belly breathing). You might find you have a tendency to hold your breath, but try not to. Do what you can to take the tension out of muscles, eg shake your arms out one at a time, and drop your heels to take the tension out of your legs. This kind of tension is known as parasitical tension, because it steals energy and drains it out of you like a tap left running. Talk to yourself with positive affirmations, such as “It’s all good,” “Just calm down,” “You can do this”.
2. Getting into good positions to place gear
It is really important to get into a comfortable position before placing the gear. How many times have you stopped, placed the gear as quickly as possible, frantically clipped in and then got yourself comfortable?
3. Climbing from a rest to a rest
This is known as chunking. For example, to climb an E2, you’re mostly climbing a VS or an HVS between the hard moves, so break it down into manageable chunks and rest on the easier bits.
4. Not stopping half way through a hard move
When it gets really hard, we tense up and want to stop, but that will add to the difficulty of the move. Staying calm enough to be able to relax in a potentially serious place is a vital skill. You should always try to over-ride the urge to place a bit of gear right by the hardest move.
Want to improve?
When I’m coaching people, I use the TTPP coaching model, which divides climbing into four areas. Here are some examples of what is included in each area:
Technical
balance / coordination / accurate footwork / efficient technique / transferring weight / body positioning / different types of climbing eg slabs, chimneys, overhangs
Tactical
concentration / focus / finding rest / onsighting skills / reading routes / preparation & training / warming up
Physical
strength / recovery time / flexibility / cardio vascular fitness / power
Psychological
determination / positivity / motivation / discipline / confidence / overcoming fear / liking challenge / emotional control / setting goals
Some areas can be sub-divided for focused work, for example strength can be divided into arm strength, leg strength and finger strength. By identifiying your strengths and weaknesses in all these areas, you can decide what to work on to improve your climbing.
Want to know more?
Why not book yourself a place on our Learn to Lead masterclass on 30th July 2020? Or join our mentoring programme when we’re next open for bookings? Or book a day of bespoke guiding on a date that suits you? We’ve been doing loads of work in the last couple of weeks with clients who have got stuck at a certain grade and want to get past the blockage. Here are a few photos to show what they’ve been achieving:

Charles Eggleston leading his first HVS at Black Crag in the Lake District, 1st June 2020

Charles Eggleston & Lizzie Cowell at Black Crag, 1st June 2020

Tom Hiley cruising on a VS 4c lead, 4th June 2020

Iain Asher on his rock climbing refresher day, 12th June 2020